
CONNECTING DEVICES
The next step is for the user has to connect the devices into the enclosure. The below picture displays the two SSDs that we have installed into the enclosure at the top of the unit. These two doors are spring loaded and open after a gentle push on the door. Once the ssd is installed and secured into the device, closing the door will snap it into position internally. We did not experience any binding or misalignment of the devices which we installed into the enclosure. Unfortunately with poorly manufactured enclosures we have ran into issues with them cracking sata connectors and being generally hard to line up and install. That was not the case with this device. The devices slid in easily and snapped into place problem free.
The top two devices can fit any 2.5 in HDD or SSD. With HDD as large as 1 TB in size currently, there is room for large capacity storage within very small devices. Once the devices need to be removed, opening the door and then pressing the length of the swinging door into the body of the device will eject the two small devices, much like a ejector for a cassette tape of old.
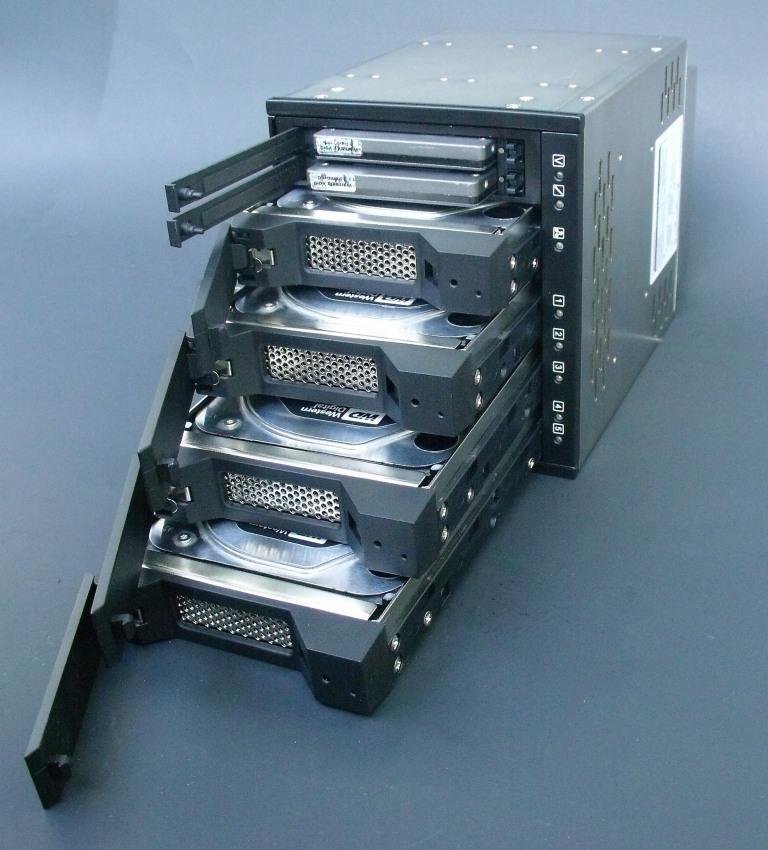
Our next goal is to install the hard drives as we see above in the lower trays. Pressing a key into the front panel will open the swinging door and, once the door is open, we gently tug on the door to slide out the tray. Note the holes that are drilled into the front of the tray that the door closes onto. There is a gap left so that the fans can suck the air through the front of the device, over the drives, and out the rear.
This ventilation is extremely important, and when observing the removed drawers below you will see that they come with a black plastic spacer installed in the middle. Once the user removes the spacer, the tray is simply composed of two sides for the drive to be fastened into. This is actually genius in its simplicity, as trays with bottoms can impede airflow. This spartan approach lends itself to excellent airflow.
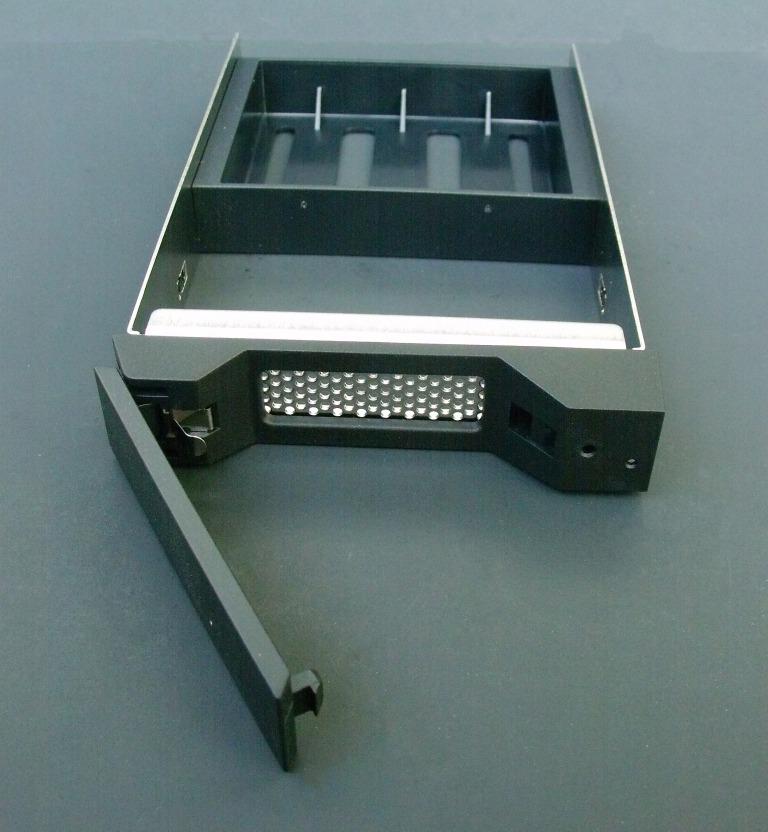
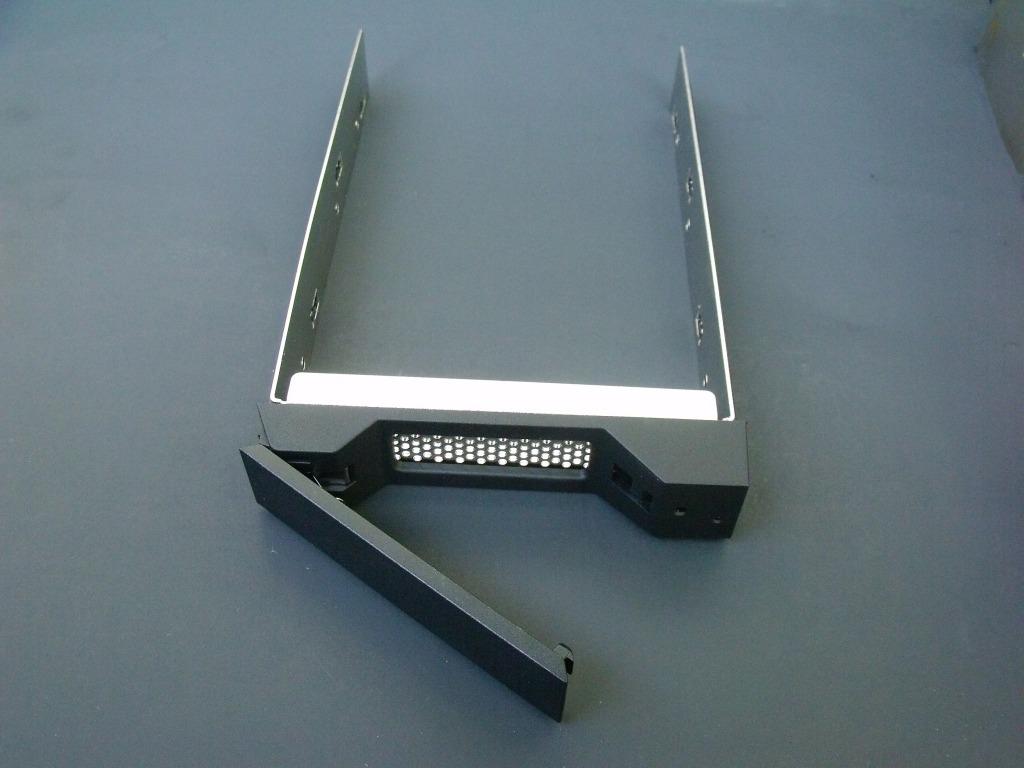
The spacer is connected with two screws on each arm of the tray. Once removed you can pop in your drive and then fasten the drive with the 3 total holes that are in each side of the tray. The drive fits snugly, leaving a slight gap at the front, so that the fresh air flowing from the front can come in and around the drive, keeping it nice and cool.
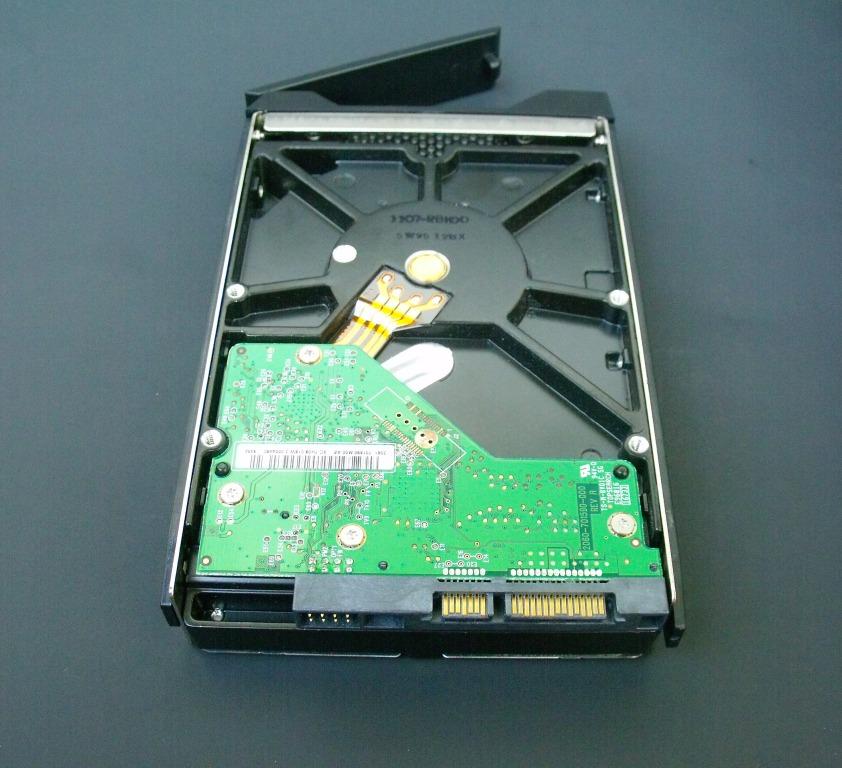
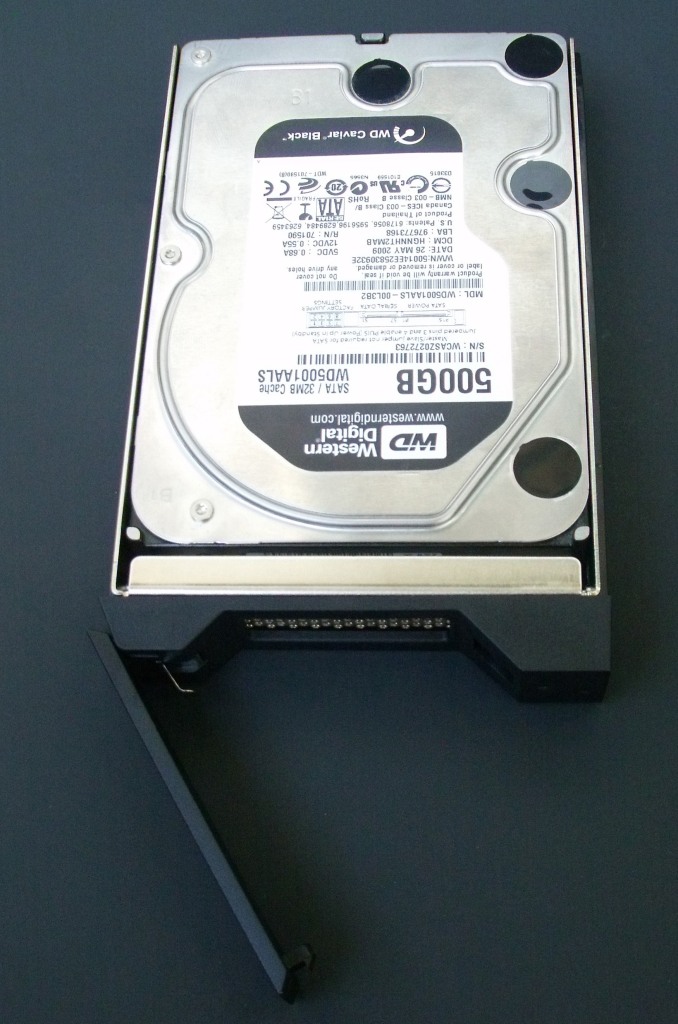
Above, we can see both the top and the bottom views of the Hard Disk Drives once they are installed. The lack of a bottom plate allows excellent cooling of the circuit board of the drive on the underside, which has chips that can get quite warm that actually control the device.
The trays then slide easily into the device itself, snapping into place nicely, and now we are ready to configure the software and test!