
HIGHPOINT RAID MANAGEMENT GUI
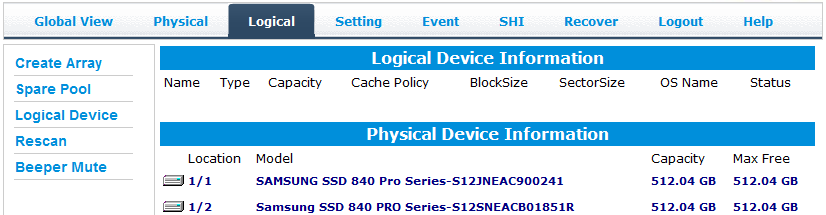
Once installed, the user must log-in with a user name and password to access the GUI; this provided with the hardware. Ensure your GUI is updated to the most recent release, ver. 2.1.4.12.1026 bring current in our case. With the SSDs situated in the RocketStor 5322 and it turned on, both will initialize, drive letters will be identified and they will appear in the GUI:
From there, select ‘Create Array’ on the left and the following screen appears:
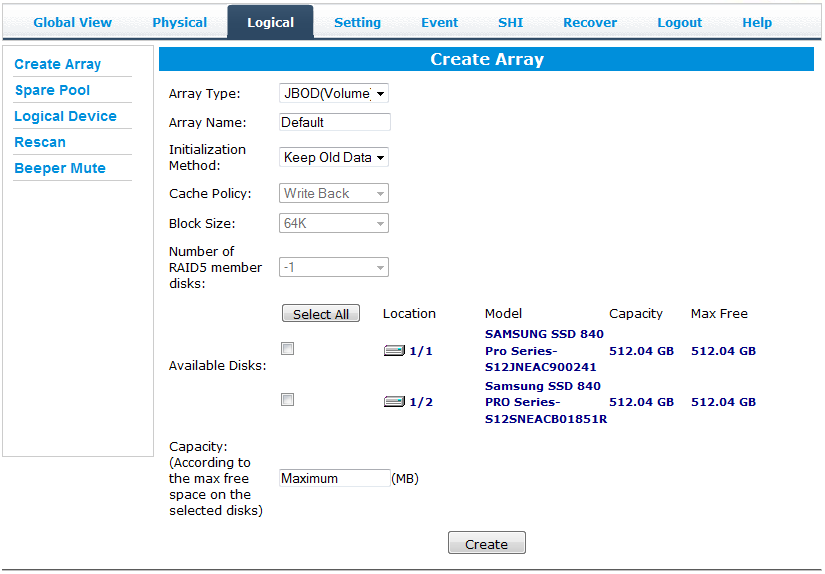
The process of creating a RAID volume takes only seconds as we select our array type (JBOD, RAID 0, 1, 5, 1/0, 5/0 and 6), name it, and choose the initialization method. At least in our use, we had no access to Cache Policy or Block Size which would have been a huge benefit in fine tuning our SSD array. Select the drives to be used, designate the capacity and hit ‘Create’
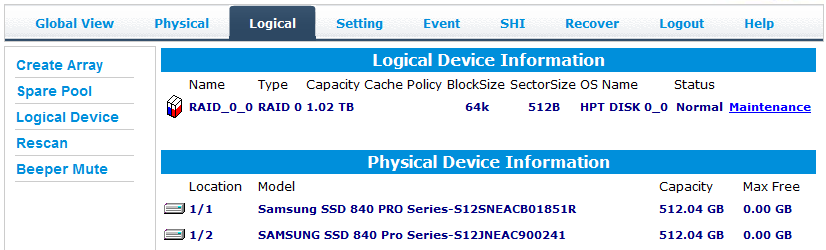
A new drive should then be identified on the system and the RAID volume appears in the GUI. This RAID 0 volume has a capacity of 1.02TB. Let’s take another look at ATTO:
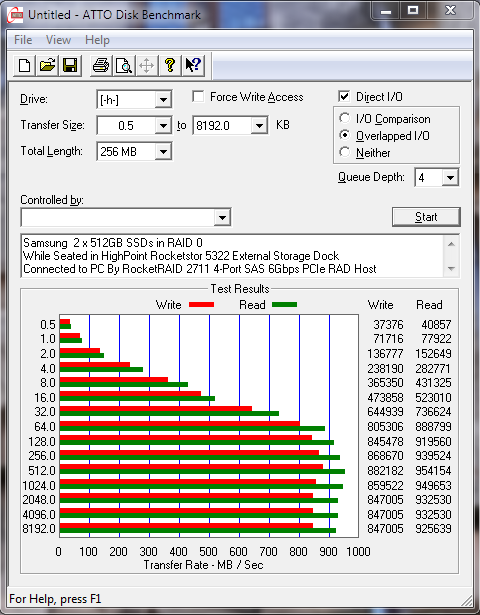
Our dual Samsung 840 Pro RAID 0 volume produces excellent performance of 925MB/s read and 847MB/s write transfer speeds, remembering of course that ATTO is the easiest method of achieving top performance as it uses higly compressible data.
This is AWESOME! I’ve been an SSD freak ever since the X25-M G1 and I currently run two 240GB Intel 520 Series SSD’s in RAID 0 in a late-2012 Mac mini. I’m getting 850MB/s reads and just under 500MB/s writes using the Blackmagic speed test utility. Is there a way to get this to work with Macs? Through a Thunderbolt port perhaps?
NO. The only similar solution we found was the OWC Helios which is a TBolt external that a PCIe fits in. We reached 900MB/s in testing that during our review.