
Closer Look, Specifications, and Benchmark Testing Platform
Finally we get to the actual board itself. As usual, Gigabytes box art is extremely colourful, and the features are well presented:
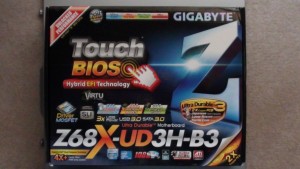
The back:

The accessories include no less than four SATA cables, one flexible SLI bridge, an I/O shield, as well as the installation manual and software disk:
Once the anti-static bag and pink foam are removed, the Z68X-UD3H-B3:
Right off the bat, you will notice that Gigabyte, as they stated, have moved away from the usual blue and white scheme colours they carried for a vast majority of their motherboards. The new matte-black and white layout looks absolutely astonishing. Considering that the vast majority of chassis have black interiors and exteriors, and that a large amount of computer components also come in black, it was the perfect decision for Gigabyte to go with this design. For some, colour may seem a trivial matter, but for others, their entire decision to buy a component may rest entirely on whether, or not it looks aesthetically pleasing.
A closer look at the Foxconn 1155 socket:
The first thing to note is that there is a massive amount of clearance to install an aftermarket CPU cooler. The only foreseeable problem would be the size of the memory modules. Since there is virtually no space between the heatsink layout and DIMM slots, the design would favour coolers that have space between the retention plate and the heatsink itself. The closer the heatsink is to the rentention plate and the CPU chip, the harder it becomes to install as most RAM modules come with bulky, custom PCB heatsinks that take a ton of room. Things get even more complicated with the addition of memory coolers.
The second interesting trait of the Z68X-UD3H-B3, which allows for more of the aforementioned clearance, is the amount of power phases. Being a consumer-friendly board, the eight-phase regulators have been cut down to seven around the socket, as a result allowing for one small VRM heatsink to provide adequate cooling. The exclusion of extra PWMs is the only major cost-saving method that may have an effect on whether a Sandy Bridge CPU can be pushed to its maximum limit while remaining stable.
The DIMM slots are in their usual spot, with a little gap in the middle for extra cooling. Again, there is essentially no spacing between the CPU bracket area and the first two slots, but with a bit of foresight, there should be no clearance issues. There is support for up to 32 gigabytes of DDR3 RAM at clock speeds of 1066/1333/1600/1866/2133 MHz.
The bottom-half of the board features two PCI-E x16 slots (x8/x8 when running dual-GPUs), two legacy PCI slots, as well as three PCI-E x1 slots. The USB, Firewire, and front panel headers round out the bottom of the board.
The SATA setup is quite interesting. There are three SATA 2.0 ports, two white SATA 3.0 ports controlled by the overlooking Z68 chipset, and a tad further there are two grey SATA 3.0 ports controlled by the Marvell 88SE9172 chipset, for a grand total of seven SATA ports.
Last but not least, the backplate contains a slew of connectors. There is a PS/2 slot, a Firewire slot, an eSATA connector, as well as four USB 2.0, and two USB 3.0 slots for a total of six USB ports on the backplate (and support for a whopping fourteen USB ports in total). There is a gigabit ethernet LAN port, as well as the analog audio connectors. The most enthralling connectors are the four different display outputs: single-link DVI, VGA, HDMI, and DisplayPort.
Comparing this to the higher-end Gigabyte Z68X-UD7-B3, there are a few things missing, although trivial. There are no power, reset, or clear CMOS buttons embedded on the Z68X-UD3H-B3. Where the UD3 has three PCI-E 1x slots, the UD7 has one, but in turn it has four PCI-E x16 slots versus the two of the UD3.
However, the UD7 lacks Intels HD graphics, and hence is missing the four separate display outputs distinctive of the UD3.
The following set-up was used in order to test the Z68X-UD3H-B3:
NEXT: CPU Benchmarks
Page 1: Introduction
Page 2: Specifications, Overview, and Features
Page 3: Closer Look, Specifications, and Benchmark Testing Platform
Page 4: CPU Benchmarks
Page 5: Computation and Productivity Benchmarks
Page 6: Storage and Peripheral Benchmarks
Page 7: Memory Benchmarks
Page 8: Gaming Benchmarks
Page 9: Overall System Benchmarks
Page 10: Z68 Chipset-Specific Benchmarks
Page 11: Temperature, Power, and Efficiency
Page 12: BIOS and Overclocking
Page 13: Final Words and Conclusion