
The enclosure is connected via SAS-to-SAS cables to the RAID Controller/HBA. The user can use one or two cables to connect to the computer. Two cables will allow a higher throughput, thus allowing the user to enjoy the “performance” mode of the product. For a user with an 8 disk HDD array, or small arrays of slower devices, one cable would definitely suffice. The user is just not going to encounter the high level of throughput and IOPS that will demand the high performance of both cables.
To kick it up another notch when using massive arrays, and extremely fast devices (and boy do we have some to show you), the performance mode is going to produce the most power.
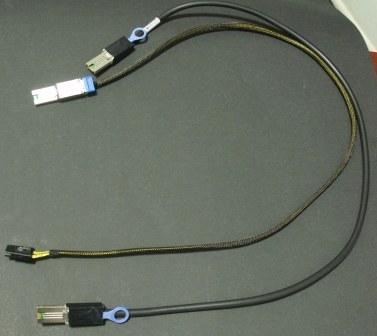
The cables used to connect to the rear of the device are 8088 External Mini SAS cables. The user can use these to connect to the external ports of a raid card to the ports on the rear of the ARC-4036. There is also the option of using 8087-to-8088 Mini-SAS cables (the yellow sleeved cables in the picture). This will allow connecting the extra cable to the internal ports on a RAID/HBA Controller, if there aren’t enough external ports available. We ran into this and used both types of cables in our testing. Bear in mind, this is an external enclosure, but for our usage we can use the internal cables, as the test bench is open-air. As you can see the cables are one sleeved unit that definitely looks much nicer than the fan out cables that are used for direct connections to devices.
The rear of the unit is going to show us quite a bit about how this device functions. The two large mesh areas at the top and bottom are fans that actively draw air into the enclosure from the front of the unit, sucking it past the drives and out the rear of the device. One thing that really strikes me is the amount of time and consideration put into this design to afford the maximum amount of airflow possible to the drives. The fans are just the beginning of the airflow, and as we go through the different components, we will point out the entire myriad of steps taken in the design to create absolutely great airflow.
The middle meshed area is the air exhaust for the power supply unit and the plug to connect power is located there as well.
The topmost connector on the right hand side of the unit is the RS232 Port connector that is used for out-of-band management of the enclosure. On the bottom right you will also see the power switch.
Directly underneath that is the four most important ports, the top two being the 8088 connectors that are going into the device, and the bottom two being the connectors that lead out of the device. Each port has individual LED indicators that show the status of that particular connector. The green LED denotes that the Link is active, and the blue LED flashes with port access, showing when the port is actively transferring data.
The top two ports will be used to connect to the enclosure to the RAID/HBA controller. The user can connect to two RAID/HBA adapters in one computer to leverage fail-over, which is multiple paths to the same device, usually for redundancies sake. It can also be used to connect both cables to one adapter for ultimate performance.
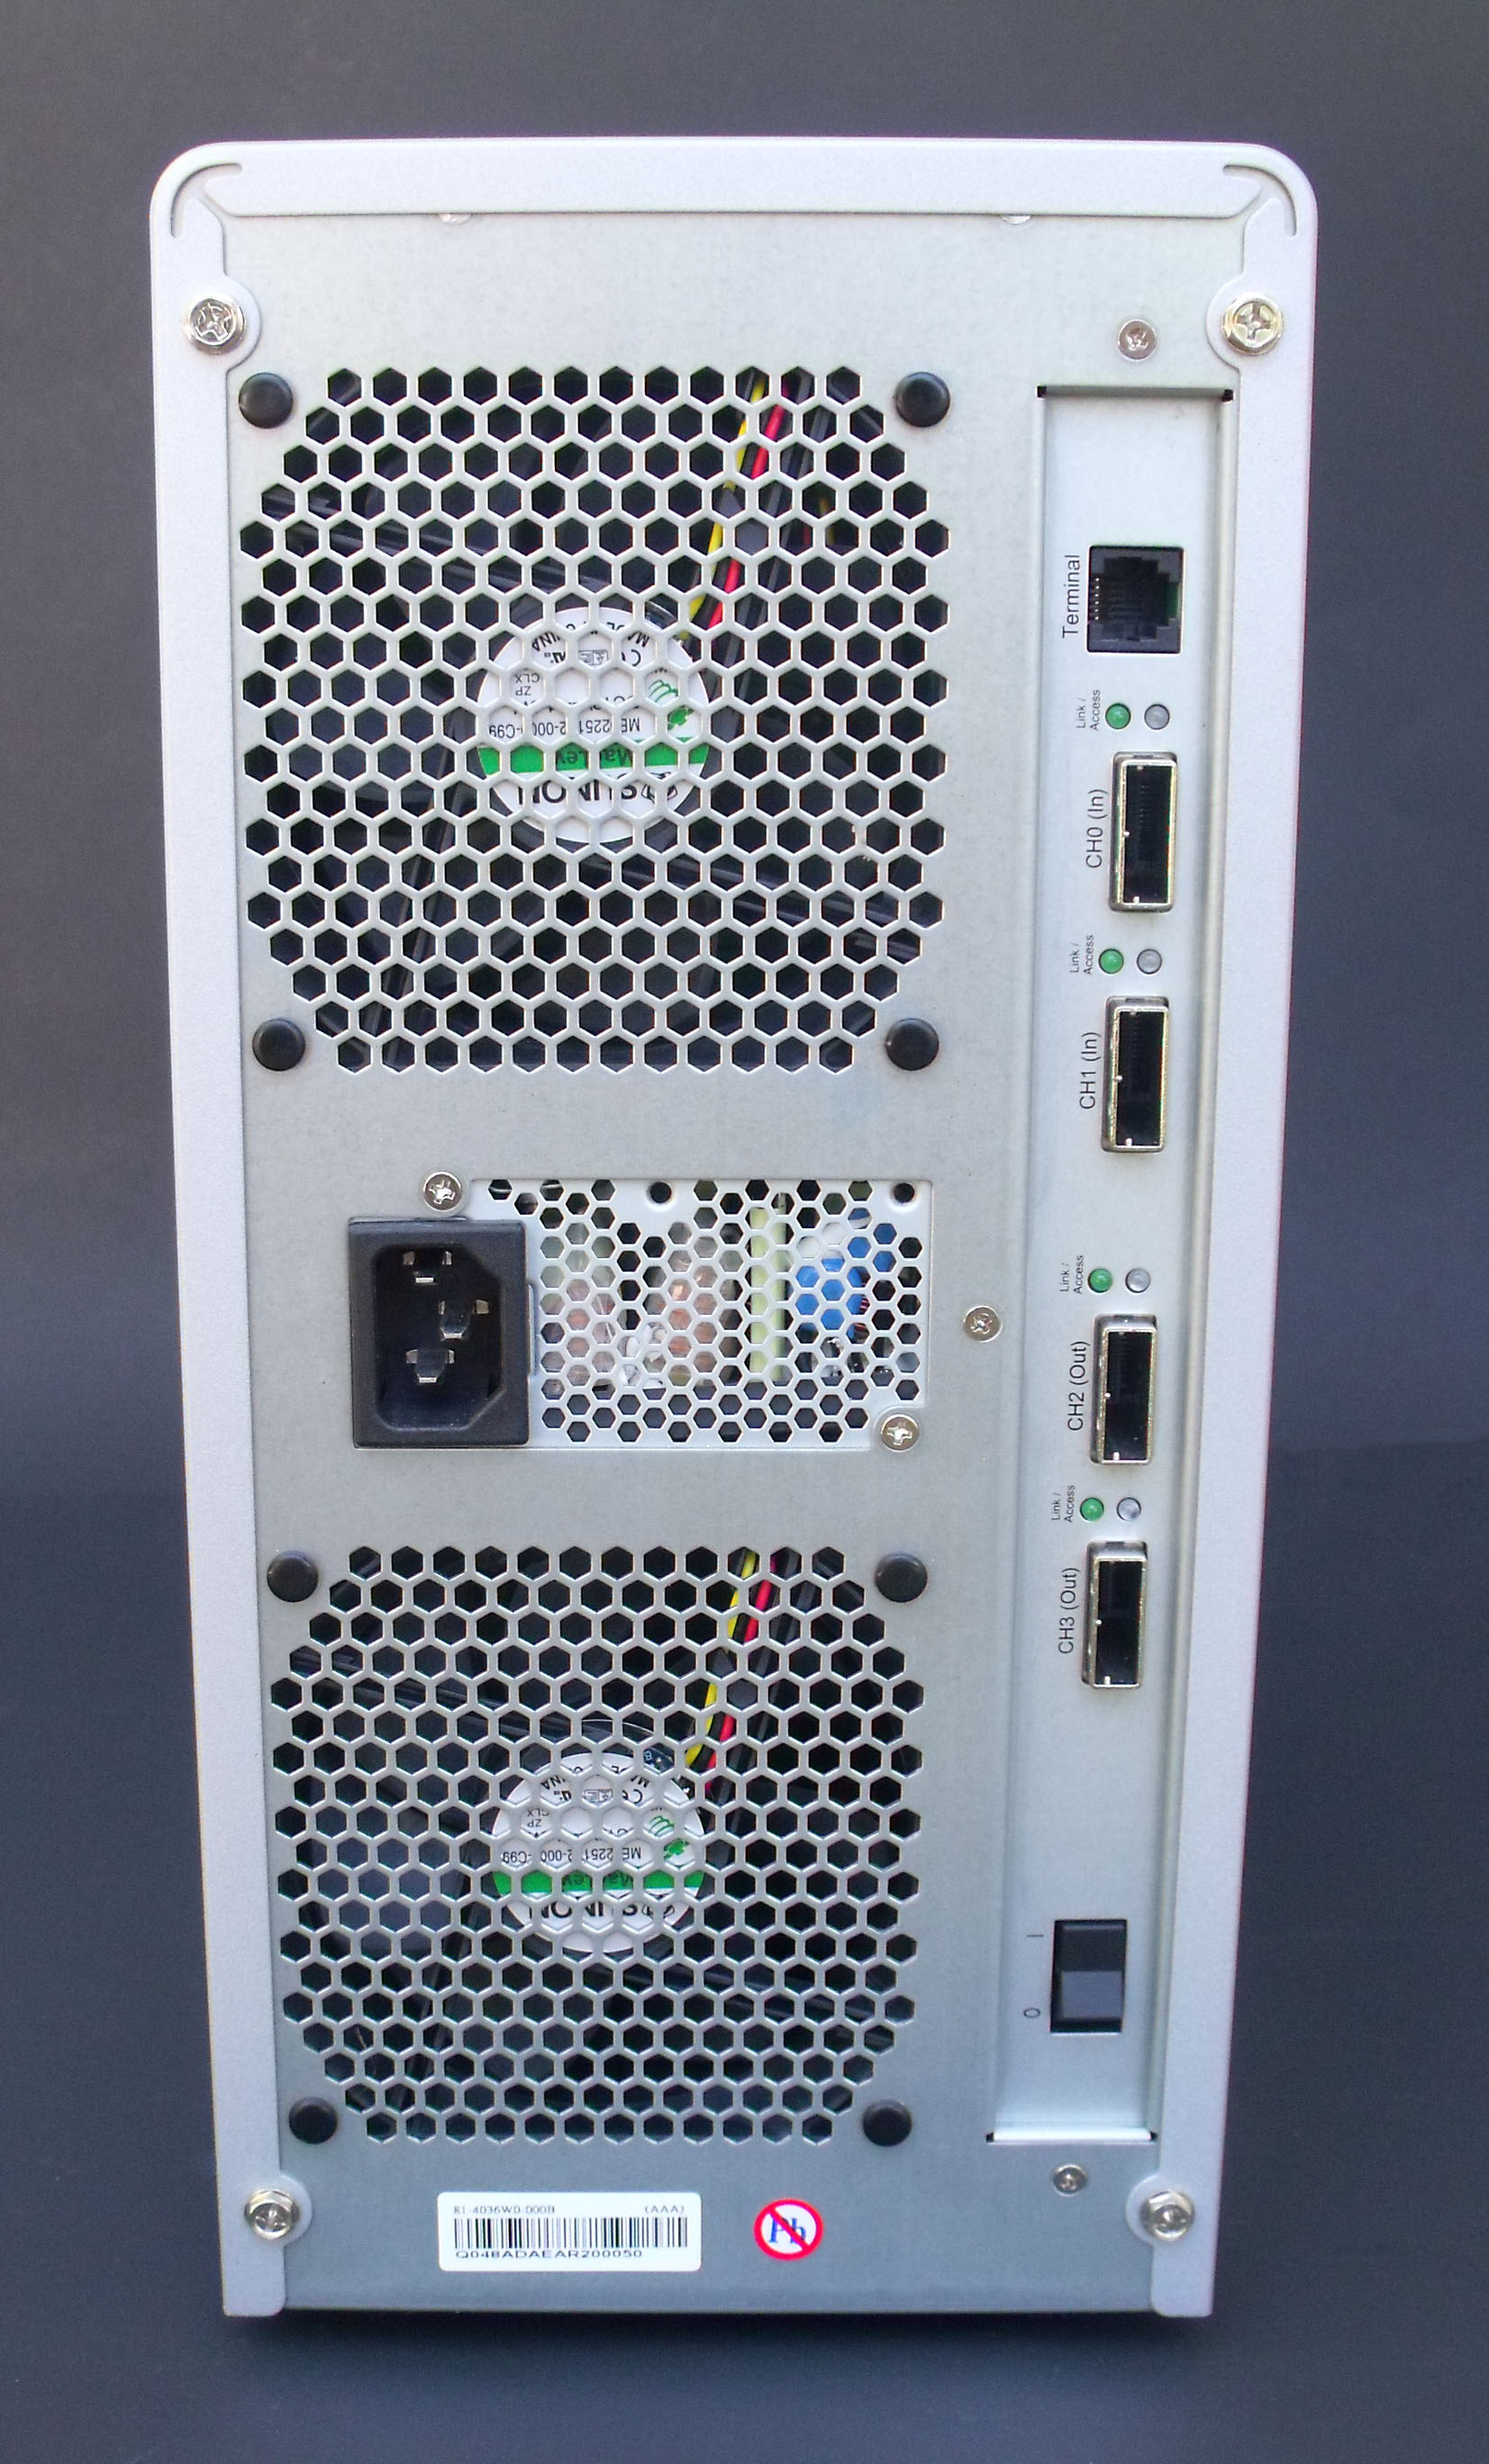 The bottom two ports are expander ports which will allow the user to connect to SAS/SATA target ports, other expander ports, and to SAS initiator ports. The enclosure also supports daisy-chaining of up to 8 enclosures! This allows for excellent scalability and the opportunity to expand the capacity of the subsystem at any time. Here is a nice graphic that shows one connection scenario:
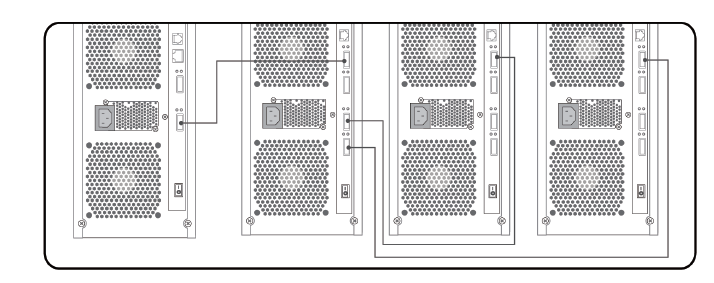
NEXT: CONNECTING DRIVES
~ INTRODUCTION ~ CONCEPTS AND USAGE ~
~ UNBOXING ~ INTERNALS ~ CONNECTIVITY OPTIONS ~ CONNECTING DRIVES ~
~ ENCLOSURE MANAGEMENT ~ TEST BENCH AND PROTOCOL ~
~ SANDISK LIGHTNING RESULTS ~ PATRIOT WILDFIRE RESULTS ~
~ CONCLUSION ~