
USER INTERFACE – RAID 1 ARRAY
The RAID 1 array that is composed of the two 2.5 inch HDD/SSDs is very easy to use; it basically drives itself. It has its own monitoring program that is separate of the larger array. Its manager is more of a monitoring tool as there is little to configure. The main configurable setting here is to enable/disable the alarm. This audible alarm, in conjunction with the flashing lights, will alert you to drive failure.
The two devices installed are the C300s and that they are in a normal condition. If one drive were to lose data, or be removed, then it would state that the array is compromised. Upon insertion of another device, the device will automatically copy the data to the new drive, rebuilding your array!
The initial configuration is simple and all that is necessary is to slide in the drives and the enclosure automatically manages them by placing them into RAID 1.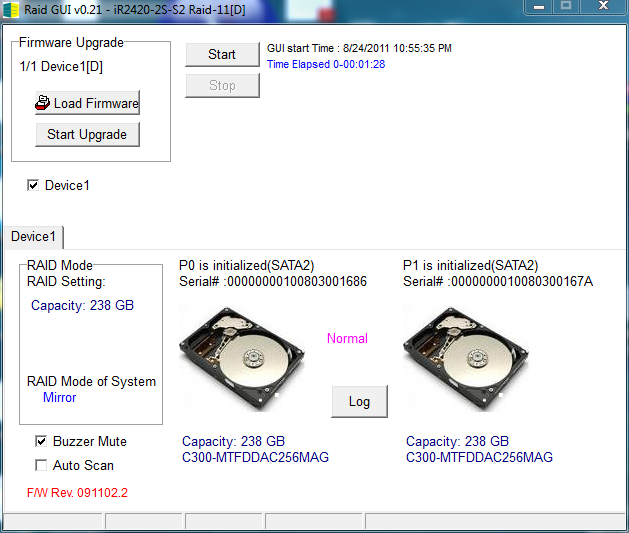 RAID 0, 1, 5 MANAGER
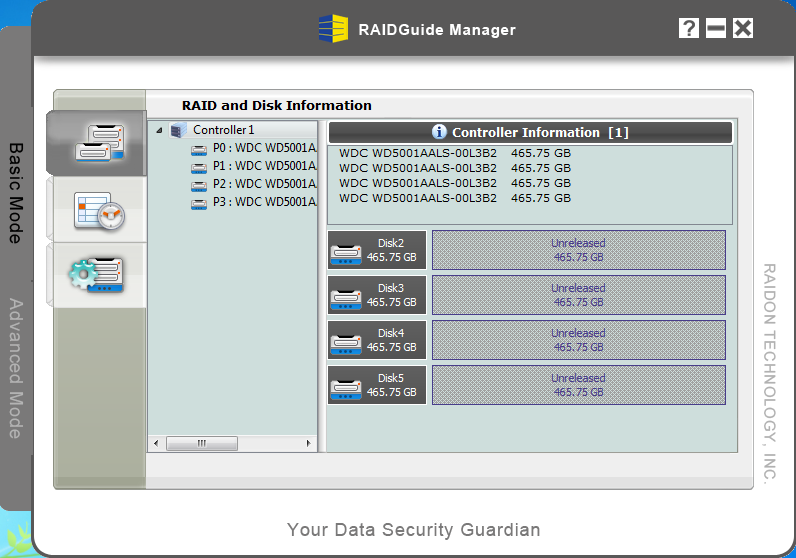
This manager program controls the larger four drive array separately. There are two screens, the Basic Mode and the Advanced Mode.
The main screen in Basic Mode will show the user three panes. The first will show basic device information and give a graphical view of the devices attached. It will also identify which type of RAID is being used on which devices. By selecting each drive, the user can also monitor the SMART data, firmware version, and capacity of the selected drive.
The other two panes will show an event log, which tracks all system changes, and the basic RAID configuration screen.
The Advanced tab brings about four more tabs on the left that you can select. The uppermost tab allows you to configure email settings so that the program can alert you to any changes in the status of the device. This would be convenient if a user had disabled the buzzer, or in a situation where the enclosure is used in a Home Server, which may not always be in view of the user. With many configurable parameters for deciding what events to be notified of, this function is very useful.
The tab below email configuration is the advanced RAID configuration pane. This pane is very similar to the RAID configuration pane in the Basic Mode, as simplicity here is key. Setting up the RAID is just as simple as clicking “Create RAID”, selecting the drives that are to be used, then selecting the RAID type. All other parameters of the RAID volume are controlled by the device itself, allowing the user a simple quick configuration.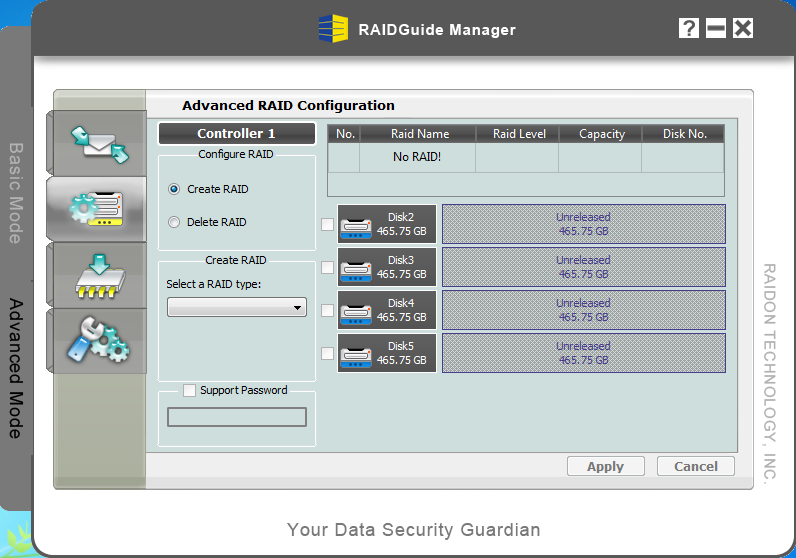
The final two tabs allow for firmware updates, so that the product can be upgraded in the future, and the lowest tab allows for the RAID rebuild priority to be assigned, should there be a failure. Overall the process is very quick and easy, and off we go to test the device!